Monday, April 22, 2013


Canoe - Part 7 

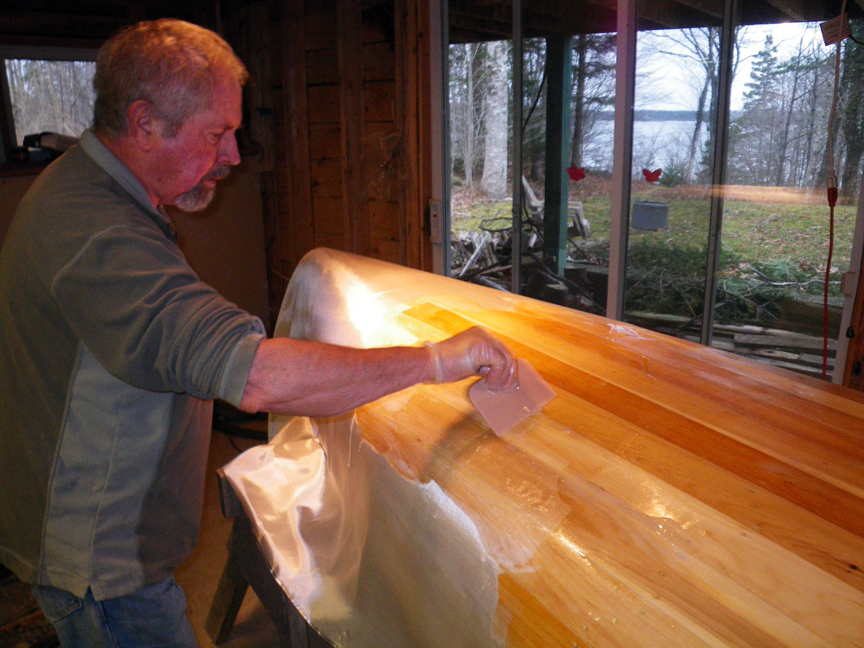
It appears the heavy sanding and cleaning worked as the next coats of resin went on without a hitch. So once again out with the sander to smooth everything up and remove the gloss to prepare the surface for paint.

Next job was to install the gunwales. First, I rabbeted them so they would cover the edge of the top plank and fit snug against the ribs. Bending the ends up and in to the decks was a bit of a challenge, calling for some creative clamping and an occasional strong word. All came out well so the shaping was done with spokeshave, plane and of course plenty of sanding by hand. A sealer coat of varnish was applied  which really brought out the beautiful reddish colour of the mahogany, a nice contrast with the cedar.

Next comes the finishing, varnished interior and trim with a red exterior. Depending on weather, should be able to accomplish this in a week or so. See below for photos.
Mahogany gunwhales and cherry deck with sealer coat of varnish

Varnishing will be completed before the seats and carrying yoke are installed

Still more sanding, preparing for varnish

Sunday, April 14, 2013


Canoe - Part 6
Another week has passed since the last update and things are progressing at a stately pace (ie., slow) After fairing and sanding the outside, fibreglass cloth was laid over the hull and epoxy resin squeegeed through it to wet it out and glue it to the wood. It came out pretty smooth so I decided to wash the waxy residue off and apply the second coat to fill the weave in the cloth. This is where the “oh, oh, dummy” happened. After a thorough washing, I spread the second coat and as I was finishing up, I noticed fisheyes forming in certain areas. That was odd because the washing was supposed to prevent that. So I tell Susan and she asks which rag I used and I say the nice clean blue one on the bucket. Whereupon she informs me this was the rag she used to wax the truck, so instead of removing wax, I was adding more. What a maroon, as Bugs Bunny would say.

So I now spend the next two days sanding off all the second coat of resin, after once again washing, this time with an old T-shirt straight from my drawer. No chances of screwing up this  time. Anyway, the hull is now really smooth and ready to be attacked again. However, being somewhat tired of sanding epoxy, I took a break , turned the canoe upright and applied a sealer coat of varnish to the inside.I figured I needed a lift in spirit so the sight of all that lovely varnished cedar did the job. Stay tuned for further adventures in canoe building.  See below for photos. 
filled and sanded
adding fiberglass cloth and first coat of epoxy
I could have trimmed it closer before I started and save having a bunch of cloth ruined by resin drips. 
Fiberglassing done. 
Sealer coat of varnish

Saturday, April 06, 2013

Ready to start sanding

Part 5

Well, a week has passed since the canoe was transferred from Scott’s shop to mine. Slower progress this past week due to other commitments.

The decks have been fitted in the ends and a temporary spreader attached where the yoke will eventually go. The interior has been sanded and today Susan and I did the outside with a long belt from a sanding machine to which I attached handles. One on each side with a back and forth motion took care of the rough sanding and fairing, after which I spent a couple of hours with the orbital sander refining the job. Tomorrow I’ll be applying fairing compound to get as fair a surface as possible before the glass/epoxy stage. See below for more photos of the week's work.
Finishing the planking (or pulling out a bad tack)
Cherry deck. On any other boat, it's called a breasthook, but on canoes, they're called decks.  Not much swabbing at all.
Sanding belt with handles. How to find out just how flabby your rowing muscles have got over the winter. Pathetic. [editorial comment from SB, if you didn't know]


Free Web Counter